Introduction
The appeal of a lush, green lawn without the burden of maintenance is prompting many homeowners to explore the option of artificial grass. However, the success of this investment relies heavily on one crucial factor: proper preparation and installation. This article examines the essential practices for establishing the ideal foundation beneath synthetic turf, including the selection of quality base materials and the application of effective installation techniques.
What are the implications if these steps are neglected? The risk of achieving a subpar lawn becomes significant, heightening the stakes for homeowners who aspire to create a beautiful, enduring landscape.
Prepare the Ground for Optimal Installation
To ensure a successful , careful is essential. Here are the :
- Clear the Area: Begin by from the installation site. This creates a clean surface for the turf to adhere to, preventing future growth that could disrupt the installation.
- Excavate the Soil: Dig down approximately 4 inches to accommodate the base materials. This depth is crucial for and helps prevent the turf from sinking over time, ensuring a stable surface. Specialists indicate that this depth facilitates , which are vital for the durability of the turf.
- Level the Ground: Use a rake to , creating a smooth and even surface. This step is vital to avoid bumps and dips in the final installation, which can affect both aesthetics and functionality.
- Check for Drainage: Ensure the ground slopes away from any structures to facilitate water runoff. A slight slope of about 2% is optimal for efficient drainage, preventing water buildup that could harm the turf.
- : Utilize a plate compactor to thoroughly . This creates a firm base that supports the weight of the turf and minimizes settling, which can lead to uneven surfaces. Omitting the base layer can result in inadequate drainage and instability, common mistakes in .
By adhering to these best practices, homeowners can establish a strong foundation for their synthetic turf, significantly enhancing its durability and visual appeal. Proper preparation not only extends the lifespan of the turf but also ensures a beautiful, .

Select and Apply Quality Base Materials
Choosing the right is crucial when considering what to put under for a successful setup. Here are the recommended materials and their applications:
- : A layer of (3-4 inches) provides excellent drainage and stability. Class II road base or decomposed granite are popular choices due to their compaction properties. A well-graded, compacted sub-base is crucial for preventing shifting and ensuring longevity.
- : Placing a over the base layer prevents weeds from growing through the grass, minimizing maintenance efforts. Utilizing high-quality, permeable materials can significantly improve the efficacy of weed management in installations.
- Infill Material: Depending on the type of , such as silica sand or rubber granules can enhance the surface's stability and provide cushioning. This step is vital for maintaining the upright position of the blades and ensuring a natural appearance.
- Compaction: After laying the , use a plate compactor to ensure they are tightly packed. is essential to prevent shifting and settling over time. Many DIY setups fail due to shortcuts taken with base preparation, making this step crucial for a .
can establish a strong foundation that supports their and enhances its performance by understanding what to put under and using premium properly.

Implement Effective Installation Techniques
To ensure a successful installation of , follow these :
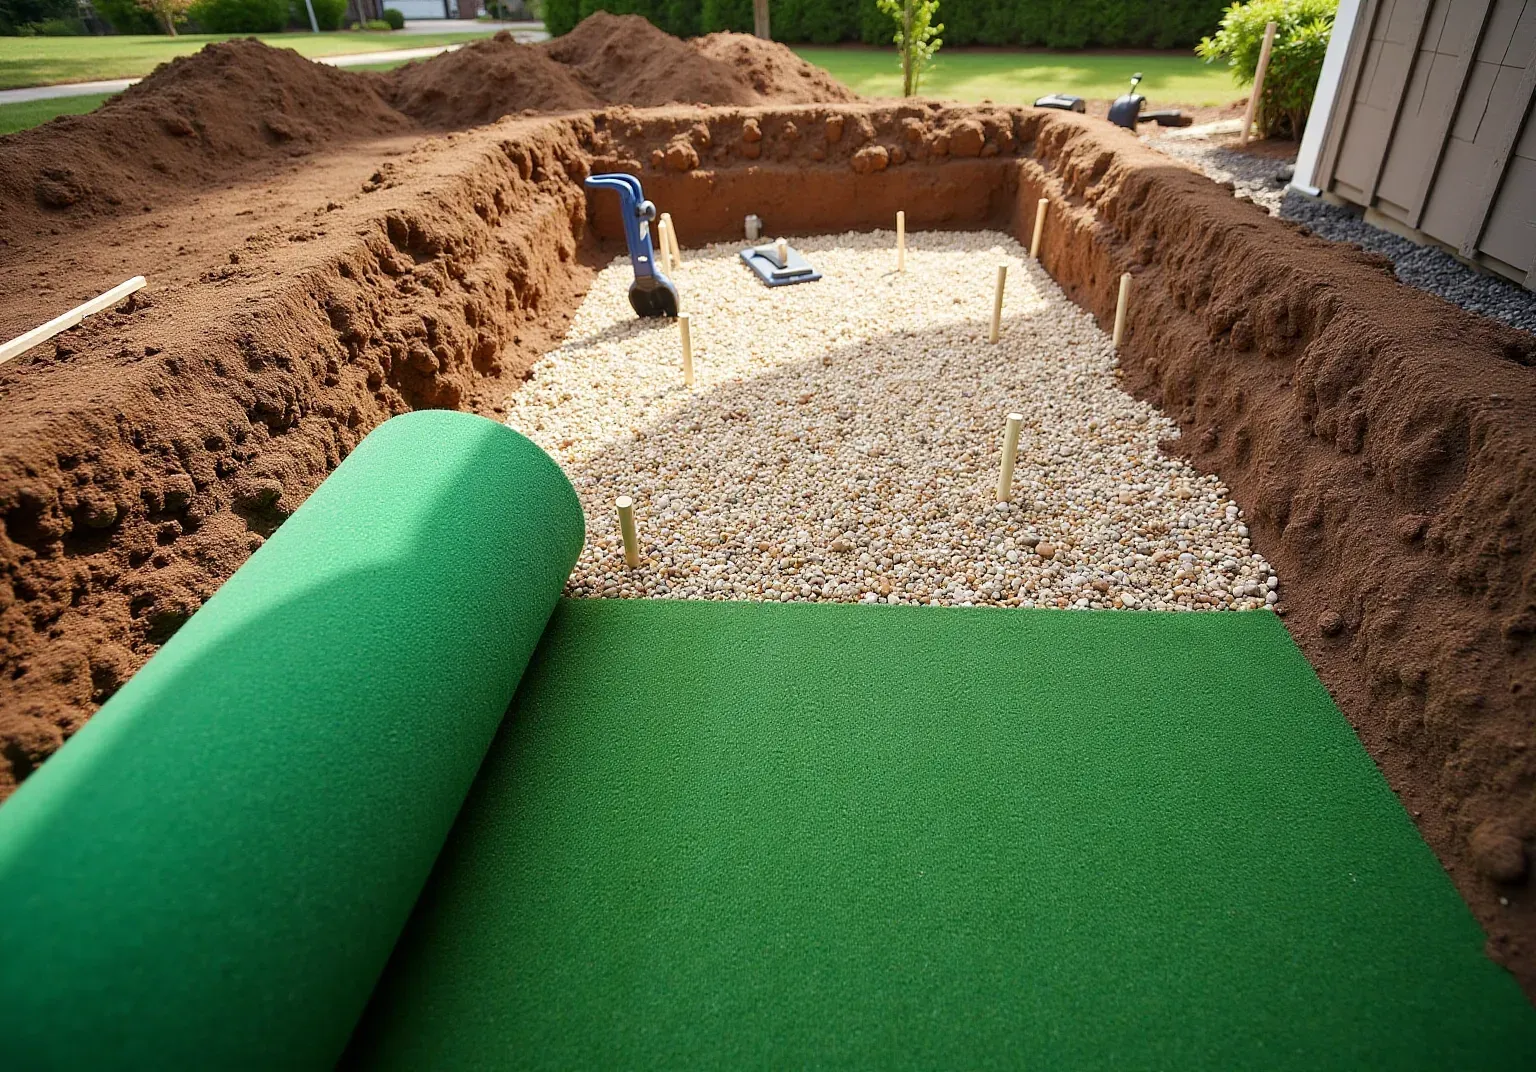
- : Roll out the over the prepared base, allowing it to acclimate for at least 24 hours. This acclimatization helps prevent wrinkling and ensures a smoother installation.
- : Use a sharp utility knife to of the grass to fit the designated area. Clean and precise cuts are essential for achieving a seamless appearance.
- Secure the Grass: Use landscaping stakes or adhesive to hold the grass in place. Position stakes every 6-12 inches along the edges to prevent any movement during and after installation. Properly securing the edges is crucial to avoid lifting and maintain the integrity of the lawn.
- Seam the Grass: When using multiple pieces of grass, ensure that seams are tightly joined with tape and adhesive. prevents gaps that can lead to visible seams and potential water infiltration.
- : After securing the grass, apply the recommended infill material evenly across the surface. This step enhances stability, supports the blades, and contributes to a natural appearance. Sand infill is particularly important for regulating temperature and improving drainage.
- : Once the infill is applied, brush the turf with a stiff broom or mechanical brush to ensure the sand settles properly and the blades stand upright. This final step enhances the realism of the lawn and ensures a professional finish.
By utilizing these installation methods, homeowners can obtain a professional-looking that is both functional and visually appealing.

Maintain Your Artificial Grass for Longevity
To maintain your in optimal condition and extend its lifespan, follow these essential :
- Regular Cleaning: Rinse the surface with water to remove dust, debris, and pet waste. A gentle spray from a hose is usually sufficient for this task.
- Brush the Turf: Use a stiff broom or brush to fluff up the grass blades, especially in . This practice helps maintain a natural appearance and prevents matting, ensuring the grass remains visually appealing.
- Inspect for Damage: Conduct every couple of weeks for signs of wear or damage, such as loose seams or tears. Addressing these issues promptly can prevent further deterioration and costly repairs. emphasize that , particularly after storms or heavy use, are crucial to preventing minor problems from escalating.
- Manage Weeds: While a weed barrier is effective, occasional weeds may still appear. Remove them by hand or apply a safe herbicide as needed to keep the surface clean.
- Seasonal Maintenance: Adjust your maintenance tasks according to the seasons; for example, remove leaves in the fall and clear snow in winter to prevent damage and maintain the turf's integrity.
Homeowners can ensure their remains vibrant and functional for years to come by knowing and implementing these maintenance methods. With proper installation and care, can , making these maintenance efforts a worthwhile investment.

Conclusion
Establishing a solid foundation for artificial grass is crucial for homeowners aiming for a durable and visually appealing landscape. Understanding what to put under artificial grass-proper ground preparation, quality base materials, and effective installation techniques-ensures a successful installation that endures over time.
Key practices emphasize the importance of thorough ground preparation:
- Clearing the area
- Excavating the soil
- Ensuring proper drainage
Additionally, selecting the right base materials, such as crushed stone, weed barrier fabric, and infill, along with meticulous installation methods, significantly contributes to the longevity and functionality of synthetic turf. Regular maintenance, including cleaning and inspections, further enhances the lifespan of artificial grass, which can potentially last up to 25 years.
Ultimately, investing time and effort in these best practices leads not only to a stunning, maintenance-free lawn but also reflects a commitment to quality and sustainability in home landscaping. Homeowners are encouraged to embrace these guidelines to create a resilient outdoor space that can be enjoyed for years to come.
Frequently Asked Questions
Why is ground preparation important for synthetic turf installation?
Ground preparation is essential for synthetic turf installation as it ensures a clean surface for the turf to adhere to, prevents future growth that could disrupt the installation, and establishes a strong foundation that enhances durability and visual appeal.
What is the first step in preparing the ground for synthetic turf?
The first step is to clear the area by removing any existing grass, weeds, and debris from the installation site to create a clean surface.
How deep should the soil be excavated for synthetic turf installation?
The soil should be excavated approximately 4 inches to accommodate the base materials, which is crucial for proper drainage and stability.
What should be done to ensure the ground is level?
Use a rake to level the soil, creating a smooth and even surface to avoid bumps and dips in the final installation.
How should drainage be managed during ground preparation?
Ensure the ground slopes away from any structures to facilitate water runoff, with a slight slope of about 2% being optimal for efficient drainage.
Why is it important to compact the soil?
Compacting the soil with a plate compactor creates a firm base that supports the weight of the turf and minimizes settling, which can lead to uneven surfaces.
What common mistakes should be avoided during synthetic turf installation?
Common mistakes include omitting the base layer, which can result in inadequate drainage and instability, and failing to properly level and compact the soil.
List of Sources
- Prepare the Ground for Optimal Installation
- baynews9.com (https://baynews9.com/fl/tampa/news/2025/04/22/artificial-turf-installation-at-hillsborough-county-schools-)
- Guide to Artificial Turf Base Prep | Elite Turf Supply (https://eliteturfsupply.com/blogs/preparing-ground-for-artificial-grass)
- What is the Best Base to Put Under Artificial Grass? (https://delaturf.com/post/what-is-the-best-base-to-put-under-artificial-grass)
- How to Prep the Base for Artificial Grass (https://installartificial.com/how/to-prep-the-base-for-artificial-grass)
- Considering synthetic turf? What homeowners should know before installation - News (https://blogs.ifas.ufl.edu/news/2025/07/15/considering-synthetic-turf-what-homeowners-should-know-before-installation)
- Select and Apply Quality Base Materials
- Artificial Grass Sub-Base explained | Purchase Green Artificial Grass (https://purchasegreen.com/blog/artificial-grass-sub-base)
- As the world heats up, so does the debate around artificial turf (https://thenewlede.org/2024/08/as-the-world-heats-up-so-does-the-debate-around-artificial-turf)
- What Goes Under Artificial Turf? Best Base Materials for Artificial Grass Installation (https://mightygrass.com/what-goes-under-artificial-turf)
- What Goes Under Artificial Grass? | Artificial Grass Direct Ltd (https://artificialgrass-direct.com/what-goes-under-artificial-grass)
- What Is the Best Base for Artificial Turf — EcoGrass (https://ecograssus.com/blog/2025/5/27/what-is-the-best-base-for-artificial-turf-the-complete-guide?srsltid=AfmBOor_LiZWa6cd_HvTX9Hl4bCmTixyuiFkDvoiVHzdTrsXBX12bLAu)
- Implement Effective Installation Techniques
- How Long Does a Putting Green Installation Take? Timeline for USA Homes (https://backninegreens.com/blog/how-long-does-a-putting-green-installation-take-step-by-step-timeline)
- Fixing 5 Challenges in Commercial Artificial Turf Installations (https://velcro.com/news-and-blog/2024/07/fixing-5-challenges-in-artificial-turf-installation)
- 18 Artificial Grass Installation Mistakes (and How to Solve Them) (https://neograss.co.uk/18-artificial-grass-installation-mistakes-and-how-to-solve-them)
- Artificial Grass Installation Steps (https://installartificial.com/how/artificial-grass-installation-steps)
- Maintain Your Artificial Grass for Longevity
- How Long Does Artificial Turf Last — EcoGrass (https://ecograssus.com/blog/2024/2/22/how-long-does-artificial-turf-last?srsltid=AfmBOopwpKo9xD12AvDsEDgSwG6RCpRVAQa4esm8l3aF9VrkBF45Xi2L)
- amarcoproducts.com (https://amarcoproducts.com/blog/post/how-long-does-turf-last)
- Best Practices for Maintaining Artificial Turf in Albuquerque | Just Sprinklers (https://justsprinklers.com/blog/2025/december/best-practices-for-maintaining-artificial-turf-i)
- purchasegreen.com (https://purchasegreen.com/blog/maintenance-routine-artificial-grass)