Introduction
Transforming a yard into a lush, green oasis is a dream for many homeowners. However, the process can often feel daunting. Installing artificial grass provides a low-maintenance solution that enhances outdoor spaces without the hassle of traditional lawn care. This guide outlines the installation process in four straightforward steps, equipping readers with the knowledge to create a beautiful, durable lawn.
Yet, what are the common pitfalls that can derail an artificial grass project? Understanding these challenges and knowing how to avoid them is crucial for a successful installation.
Develop a Comprehensive Turf Plan
To successfully complete the installation of , begin by thoroughly assessing the area where you intend to lay the material. Here’s a streamlined approach to ensure a :
- : Accurately measure the dimensions of the space, noting its shape and any existing features such as trees, pathways, or slopes. This will help you determine the quantity of grass required and identify any potential obstacles.
- : Choose the type of that best fits your intended use-whether for a , a playground, or a . Consider factors such as durability, color, and texture to ensure it meets your aesthetic and functional needs. In California, the average setup cost varies from $14 to $18 per square foot, depending on the turf type and installation details.
- : Proper drainage is crucial to prevent water pooling and ensure longevity. Assess the area for natural drainage patterns and consider grading the surface or installing drainage systems as needed. This step is vital, especially in regions prone to heavy rainfall.
- : Outline your budget for both materials and installation. This will guide your choices and help you avoid overspending. While DIY methods can save costs, the often yields better results and can prevent costly mistakes.
- : Create a sketch or utilize design software to visualize the final layout, including any additional features like borders or landscaping elements. This will help you understand how the synthetic turf integrates with your existing landscape and ensure that your vision is attainable.
By following these steps, you can create a comprehensive turf plan that enhances your property’s aesthetic appeal while addressing practical considerations such as maintenance and drainage.

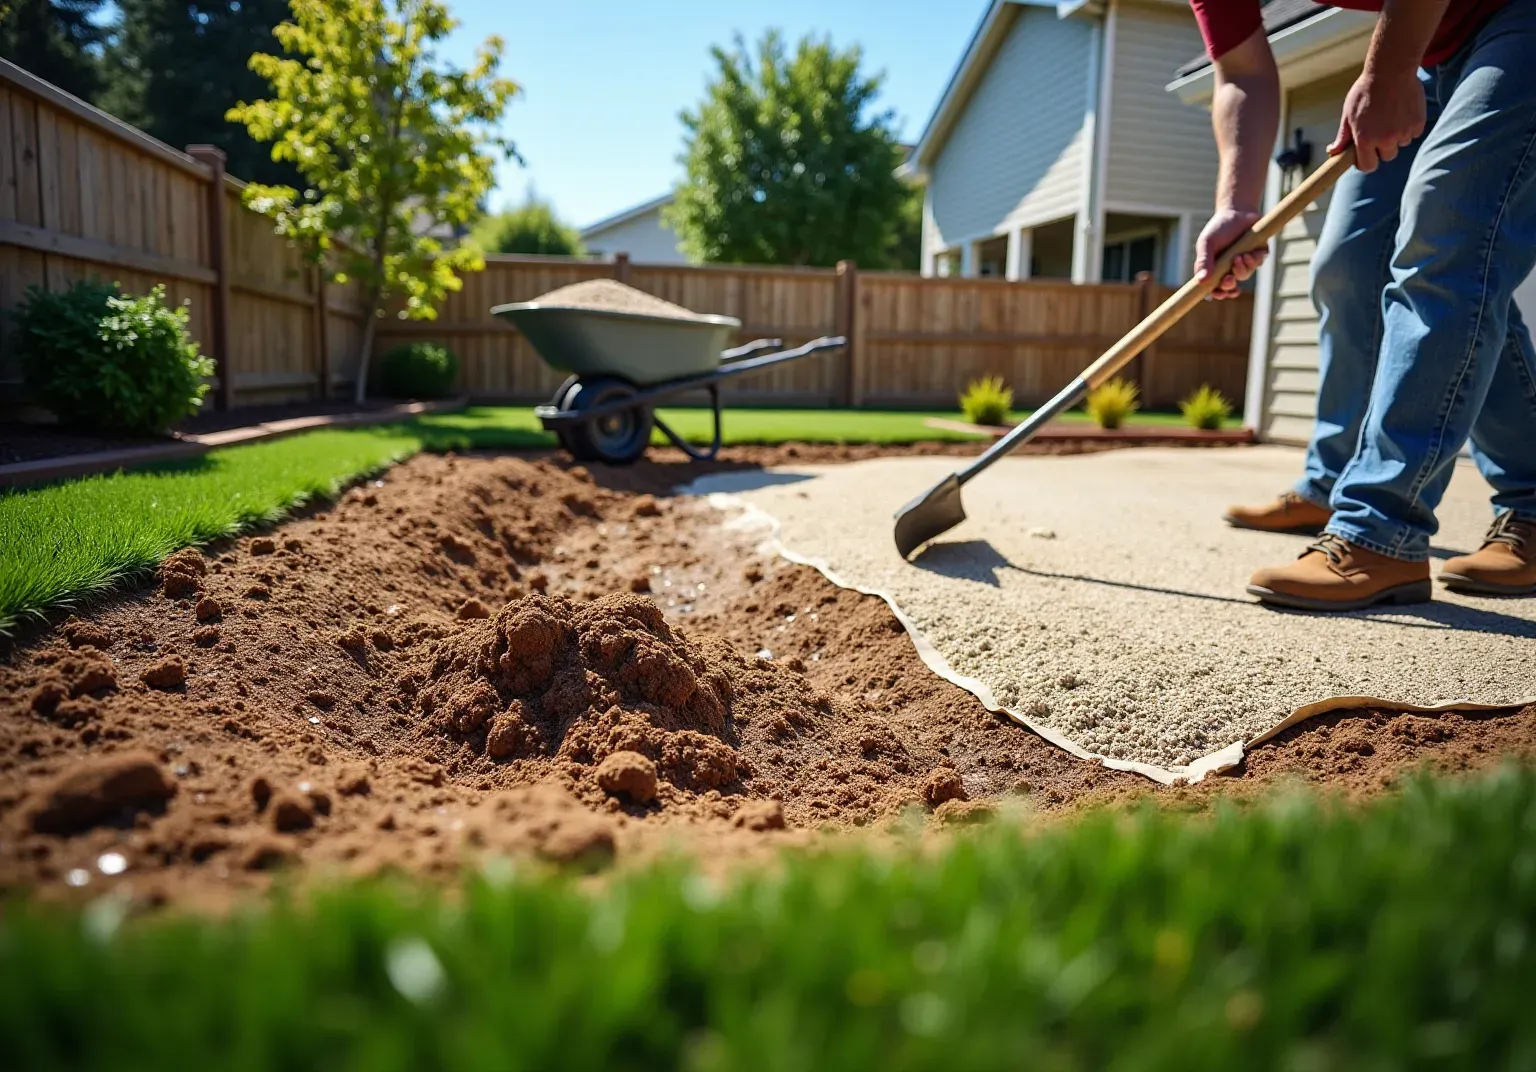
Prepare the Base for Artificial Grass
- Clear the Area: Begin by removing any existing grass, weeds, and debris from the setup site. Use to create a for your project.
- Excavate the Soil: Dig down to a depth of 3-4 inches, which is generally sufficient for residential applications. This excavation creates space for the base material and ensures . Ensure the area is flat and free of stones to facilitate a .
- Install a Weed Barrier: Lay down a to prevent unwanted growth beneath the grass. This step is crucial for maintaining the integrity of your and prolonging its lifespan.
- Add Base Material: Fill the with 2-3 inches of . These materials provide excellent drainage and stability, which are essential for the . It is recommended to use about 1 cubic yard of base material for every 80-100 square feet of grass area at a 3-inch depth.
- Compact the Base: Use a plate compactor to thoroughly . As emphasized by Aaron Massey, compaction is vital because loose soil or fill will settle over time. This step is essential for preventing settling and ensuring a smooth, even surface, which enhances the overall appearance and functionality of the . Additionally, consider using a stiff-bristled push broom or turf rake to work sand into the turf fibers for a uniform surface.

Install and Secure the Artificial Grass
- Roll Out the Turf: Begin by unrolling the over the prepared base. Allow it to acclimate for a few hours to minimize creasing and .
- : Trim the edges of the grass to fit the designated area, leaving a slight overhang for tucking under later. Utilize a sharp utility knife for precise, clean cuts that enhance the final appearance.
- : using galvanized nails or staples, spacing them approximately 6 to 8 inches apart. This spacing is crucial for maintaining stability and preventing shifting. For optimal anchorage, consider using 6 to 7-inch spiral nails, which provide a robust grip, especially in high-traffic areas. As noted, " that prevents grass from shifting or lifting."
- Seam the Pieces: When working with multiple sections of grass, . Apply seaming tape and adhesive to bond the edges, ensuring a that enhances durability and aesthetics.
- : Finally, of the grass under any borders or hardscaping elements. This step not only creates a polished finish but also helps prevent lifting, ensuring the longevity of your installation of . Regular inspections of the installed grass for signs of shifting or loose edges are recommended to maintain its appearance and performance over time. A properly installed surface will offer a beautiful, that enhances your outdoor area.

Apply Final Touches and Maintenance Tips
- Brush the Grass: Regularly use a power broom or a stiff-bristled broom to brush the grass fibers upright. This practice helps maintain a natural appearance and redistributes the infill, ensuring the grass looks lush and inviting. Regular brushing is crucial for maintaining the integrity of the grass and enhancing its visual appeal. For expert assistance, consider California Lawn Company's .
- Add Infill: If necessary, evenly spread infill material across the surface. This step is essential for , particularly in sports applications where performance is key. Current recommendations suggest using that support the turf's structure while enhancing its longevity. California Grass Company offers a range of infill options tailored to your specific needs.
- Clean Regularly: To keep your artificial grass looking pristine, remove debris such as leaves and dirt using a leaf blower or rake. , which can lead to odors and an unsightly appearance. A weekly maintenance routine can take as little as 15-30 minutes, ensuring your lawn remains fresh and inviting. For a thorough clean, consider .
- Address Stains Promptly: For any spills or stains, promptly clean the affected area with a mixture of mild soap and water. Avoid using harsh chemicals that could damage the turf fibers. Quick action helps prevent stains from setting and maintains the overall cleanliness of your lawn. For tougher stains, a mixture of water, mild detergent, and a sponge is recommended. can provide for stubborn stains.
- Inspect Periodically: , particularly around seams and edges. Early detection of issues allows for prompt repairs, preventing larger problems and extending the lifespan of your artificial grass. It is advisable to apply weed and moss treatment at least twice a year to maintain the turf's health. By following these maintenance tips and utilizing California Lawn Company's services, homeowners can enjoy a beautiful, low-maintenance lawn that enhances their property for years to come, particularly after the .
For personalized advice and , consider initiating your free consultation with today!

Conclusion
Successfully installing artificial grass transforms your outdoor space into a beautiful and functional area. By following a systematic approach - from developing a comprehensive turf plan to applying final touches and maintenance tips - homeowners can achieve a stunning lawn that requires minimal upkeep.
Key components of the installation process include:
- Careful Measurement and Planning: Ensuring accurate dimensions for a perfect fit.
- Proper Base Preparation: Creating a solid foundation for durability.
- Secure Installation Techniques: Employing methods that guarantee longevity.
- Ongoing Maintenance Practices: Keeping the lawn in top condition over time.
Each step is designed to ensure durability, aesthetic appeal, and functionality, allowing for a seamless integration of artificial grass into existing landscapes. Understanding the importance of drainage, selecting the right materials, and conducting regular inspections will further enhance the longevity of your investment.
Ultimately, mastering the installation of artificial grass elevates the visual charm of your property while providing a low-maintenance solution that withstands the test of time. Embracing these best practices empowers homeowners to create an inviting outdoor space, making the effort put into the installation process well worth it. For those looking to enhance their lawns, taking the first step towards professional installation or DIY methods will lead to a rewarding transformation.
Frequently Asked Questions
What is the first step to take when installing artificial grass?
The first step is to thoroughly assess the area where you intend to lay the material, which includes accurately measuring the dimensions and noting any existing features such as trees, pathways, or slopes.
How do I select the appropriate type of artificial grass?
Choose the type of artificial grass based on its intended use, whether for a backyard putting green, a playground, or a pet-friendly lawn. Consider factors like durability, color, and texture to ensure it meets your aesthetic and functional needs.
What is the average cost of installing artificial grass in California?
The average setup cost in California varies from $14 to $18 per square foot, depending on the type of turf and installation details.
Why is drainage important when installing artificial grass?
Proper drainage is crucial to prevent water pooling and ensure the longevity of the grass. It's important to assess the area for natural drainage patterns and consider grading the surface or installing drainage systems, especially in regions prone to heavy rainfall.
How can I establish a budget for my artificial grass installation?
Outline your budget for both materials and installation to guide your choices and avoid overspending. While DIY methods can save costs, professional installation often yields better results and can prevent costly mistakes.
Should I visualize my design before installation, and how can I do that?
Yes, visualizing your design is important. You can create a sketch or use design software to visualize the final layout, including any additional features like borders or landscaping elements, to ensure that your vision is attainable and integrates well with your existing landscape.
List of Sources
- Develop a Comprehensive Turf Plan
- Artificial Grass, Market Trends, Business Insights, and Analysis (https://installartificial.com/how/artificial-grass-business-insights-market-trends)
- How Much Does Artificial Grass Cost in 2026? (https://lawnstarter.com/blog/cost/artificial-grass-price)
- 2026 Artificial Grass Installation Cost | Angi (https://angi.com/articles/how-much-does-artificial-turf-cost.htm)
- A new Florida law could create a turf lawn boom, defying local stopgaps (https://tampabay.com/news/2025/07/01/new-florida-law-could-create-turf-lawn-boom-defying-local-stopgaps)
- Prepare the Base for Artificial Grass
- Artificial Turf Installation a DIY Guide (https://synlawn.com/articles/artificial-turf-installation-a-diy-guide)
- How to Install Artificial Grass (The Complete Guide) (https://aquablumosaics.com/blogs/news/how-to-install-artificial-grass?srsltid=AfmBOorFsQHMutGE0rzVrPCTdT4WJ3XDuYsLlc6cgSkJP0I0hWcGy2Yk)
- How to Install Artificial Grass on Soil | US Turf (https://usturfsandiego.com/news/how-to-install-artificial-grass-on-soil)
- How to Choose the Right Base for Artificial Grass (https://realturf.com/us/what-sub-base-is-best-for-your-artificial-grass)
- How Much Base Material Is Required for My Houston Synthetic Turf Installation? (https://orionturfandlandscape.com/blog/how-much-base-material-is-required-for-my-houston-synthetic-turf-installation)
- Install and Secure the Artificial Grass
- Everything You Need To Know About Anchoring Artificial Grass During Installation - SGW Nevada (https://sgwnevada.com/blog/everything-you-need-to-know-about-anchoring-artificial-grass-during-installation)
- How to Install Artificial Grass (The Complete Guide) (https://aquablumosaics.com/blogs/news/how-to-install-artificial-grass?srsltid=AfmBOoo6aelMtrU6jn91tASNpcCgPajhx9cKsNAt8ZoDnoZcGFuitYKW)
- Ultimate Guide to Securing Artificial Turf (https://premiumgrassblades.com/the-ultimate-guide-to-securing-artificial-turf-spiral-nails-staples-and-proper-installation)
- How To Install Artificial Grass | SGW (https://sgwflorida.com/orlando/resources/installing-artificial-grass/step-by-step-guide-to-installing-artificial-grass)
- How to Install Artificial Grass on Soil | US Turf (https://usturfsandiego.com/news/how-to-install-artificial-grass-on-soil)
- Apply Final Touches and Maintenance Tips
- Artificial Turf Maintenance Guide | Cleaning & Care Tips (https://fieldturflandscape.com/maintenance/artificial-turf-maintenance-guide)
- How to Maintain Your Artificial Grass All Year Round (https://synlawn.com/articles/how-to-maintain-artificial-grass)
- How To Maintain & Care For Your Synthetic Grass | SGW (https://syntheticgrasswarehouse.com/resources/maintenance-care)
- Artificial Grass Maintenance Tips | Synthetic Turf Northwest (https://syntheticturfnorthwest.com/maintenance-tips-for-your-synthetic-turf)
- Maintaining Artificial Turf (https://watersaversturf.com/maintaining-artificial-turf)