Introduction
Artificial grass has gained popularity among homeowners looking for a low-maintenance and visually appealing lawn. However, the installation process can be intimidating, involving several steps that demand precision and care. This guide outlines four essential steps that will enable homeowners to successfully join artificial grass, ensuring a seamless and durable finish. Additionally, it addresses common pitfalls that can transform this DIY project into a frustrating experience and offers strategies to avoid them.
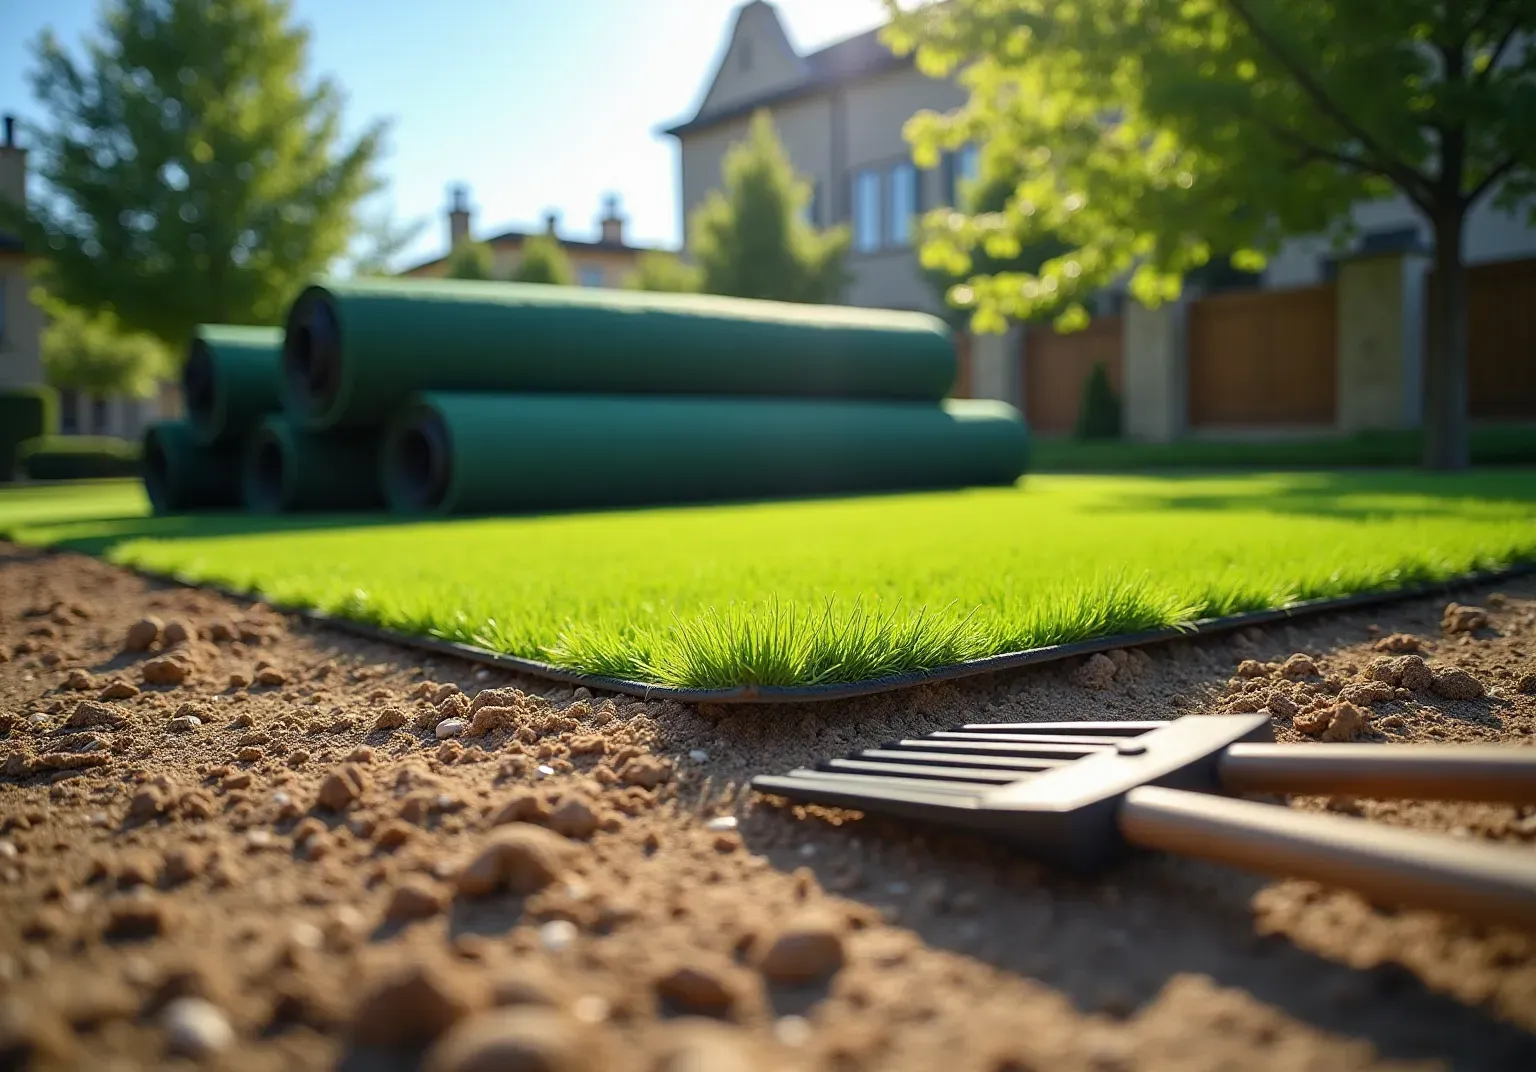
Prepare the Site for Joining Artificial Grass
- : Begin by removing any existing vegetation, weeds, or debris from the location designated for . Utilize a shovel or a sod cutter to achieve a clean surface.
- : Employ a rake to , ensuring it is smooth and even. If low spots are present, fill them with soil or sand to create a flat surface.
- : After leveling, using a plate compactor or a hand tamper. This step is crucial to after the turf is installed.
- : Lay down a fabric to inhibit weed growth through the synthetic turf. This measure will help maintain the integrity of your installation over time.
- : Verify that the area has to prevent water pooling. If necessary, create a slight slope away from structures to facilitate proper drainage.

Cut and Align the Edges of the Grass
- Prepare the Area: Before unrolling the sod, ensure the is clean and free of debris, rocks, or roots. This preparation is essential for during the process of .
- Unroll the Turf: Lay out the sections of in the designated area, ensuring that the pile direction is consistent across all pieces. The uniformity achieved by joining is crucial for creating a .
- Trim the Edges: Utilize a sharp utility knife to of the turf, allowing for a precise fit. It is advisable to leave an extra 2 inches of turf around the perimeter to accommodate any necessary adjustments during installation.
- Align the Sections: Position the two pieces of vegetation side by side, ensuring that the edges align perfectly. Aim for close stitches when to minimize visibility, which enhances the overall aesthetic of the installation.
- Check for Consistency: Step back and visually inspect the alignment of the turf. Make any necessary adjustments before securing the pieces together, as this final check is essential for a polished look.
- : Be careful not to hurry the , as this can result in jagged edges and irregular joints. Always double-check your measurements before cutting to avoid over-cuts.

Secure the Joined Sections of Artificial Grass
- Apply Tape: Begin by placing tape underneath the joined edges of the grass, ensuring it is centered along the joint for consistent adhesion. It is important to note that when , tape used for joints is not recommended for , so be sure to consider this when planning your project.
- Apply Adhesive: Next, spread a thin layer of over the tape using a notched trowel. Aim for an even coat to prevent puddles, which can compromise the bond. A 2mm layer is recommended for optimal adhesion.
- Press the Edges Together: Carefully press the edges of the grass down onto the adhesive, ensuring a . Walking along the joint helps apply even pressure, which is essential for a strong bond. This step is crucial as it prevents gaps that could result in joint failure.
- Secure with Nails: To further stabilize the edges, use or staples, placing them every 6 inches along the perimeter. This additional security helps maintain the integrity of the installation, especially in high-traffic areas. Additionally, securing the edges of the lawn with edging is recommended to prevent lifting.
- Check for Gaps: Finally, inspect the joint for any gaps or loose areas. If you find any, apply additional adhesive or nails to secure these spots. , including properly by brushing the turf after installation to ensure sand material settles correctly and fibers remain upright, will help maintain the seams looking immaculate and avoid any problems over time.

Apply Infill and Brush the Joined Grass
- Choose the Right Material: Selecting the appropriate is crucial for your intended use. For general applications, silica sand serves as a reliable option. In contrast, due to its cushioning properties. For a more , consider organic filling alternatives, which enhance drainage and reduce heat retention.
- Distribute the Material: Employ a drop spreader to evenly distribute the material across the grass surface. Aim for a depth of approximately 1-2 pounds per square foot, adjusting based on the specific type of material selected. is vital, as it significantly influences the grass's performance and longevity. As noted, "Artificial surface material has progressed beyond merely being an essential element of ; it has transformed into a vital aspect affecting performance, durability, and environmental consequences."
- Brush the Turf: After applying the material, utilize a stiff-bristled broom or a power broom to lift the blades and ensure even distribution. This step is essential for maintaining a and enhancing the overall feel of the grass.
- Final Inspection: Walk over the grass to confirm that the material is uniformly distributed and that the are standing upright. Make necessary adjustments by adding more material or brushing again to achieve the desired look and functionality. Insufficient material can lead to issues such as collapse and overheating, adversely affecting the durability of your grass.
- : Regularly brush the turf to keep the blades upright and free from debris. Periodically check the filling levels and replenish as needed to maintain optimal performance. Consistent maintenance when joining not only enhances aesthetic appeal but also prolongs its lifespan. Notably, the to reach USD 2.17 billion by 2026, underscoring the growing importance of quality infill in maintaining your lawn.

Conclusion
In conclusion, joining artificial grass is a multifaceted process that, when executed correctly, results in a stunning and durable lawn. Homeowners who invest time and effort into proper installation will reap the benefits in both appearance and maintenance. This guide has outlined essential steps for a successful installation, including:
- Preparing the Site: Properly level and compact the ground to create a solid foundation.
- Cutting the Edges: Ensure precise cuts for a seamless finish.
- Securing the Seams: Align turf sections with precision and use the right adhesive to secure them.
- Applying Infill: Choose appropriate infill materials to enhance durability and functionality.
Each of these steps is crucial in achieving a professional-looking installation that can withstand the test of time. Additionally, understanding common pitfalls and how to avoid them can significantly improve the overall outcome of the project.
By diligently following these outlined steps, homeowners can enjoy a beautiful, low-maintenance outdoor space that remains inviting and functional for years to come.
Frequently Asked Questions
What is the first step in preparing a site for joining artificial grass?
The first step is to clear the area by removing any existing vegetation, weeds, or debris from the designated location for synthetic turf installation.
How do you ensure the ground is suitable for artificial grass installation?
You need to level the ground using a rake to make it smooth and even. If there are low spots, fill them with soil or sand to create a flat surface.
Why is it important to compact the soil before installing artificial grass?
Compacting the soil is crucial to prevent settling after the turf is installed, ensuring a stable and even surface.
What should be done to prevent weed growth under the synthetic turf?
A weed barrier fabric should be laid down to inhibit weed growth through the synthetic turf, helping to maintain the installation's integrity over time.
How can you ensure proper drainage in the area designated for artificial grass?
Check for adequate drainage to prevent water pooling and, if necessary, create a slight slope away from structures to facilitate proper drainage.
List of Sources
- Prepare the Site for Joining Artificial Grass
- lawnpop.com (https://lawnpop.com/how-to-prepare-the-ground-before-laying-artificial-grass)
- How to Install Artificial Grass on Soil | US Turf (https://usturfsandiego.com/news/how-to-install-artificial-grass-on-soil)
- Artificial Turf Market, Industry Size Forecast [Latest] (https://marketsandmarkets.com/Market-Reports/artificial-turf-market-121486580.html)
- shawgrass.com (https://shawgrass.com/about/news-blog/how-to-prep-for-artificial-grass-installation)
- How To Prepare Your Home for Artificial Grass Installation: 5 Expert Tips - SGW Colorado (https://sgwcolorado.com/blog/2025/08/28/how-to-prepare-your-home-for-artificial-grass-installation-5-expert-tips)
- Cut and Align the Edges of the Grass
- Making the Cut: Expert Tips for Perfectly Cutting Your Artificial Turf Every Time | Synthetic Grass Warehouse (https://syntheticgrasswarehouse.com/blog/making-the-cut-expert-tips-for-perfectly-cutting-your-artificial-turf-every-time)
- Best Practices for How to Lay Fake Grass | NexGen Lawns (https://nexgenlawns.com/how-to-lay-and-cut-fake-grass?srsltid=AfmBOoqT0Thnvjf-kqvc2WNuirVcjNEw8R3B084GBDGgZ9HFCuc3jVGi)
- Case Study: Standing Out for a Synthetic Grass Provider (https://customerswhostick.com/case-study-grass-provider)
- How to Cut Artificial Grass: A Step-by-Step Guide - CCGrass (https://artificialgrasslandscape.com/how-to-cut-artificial-grass-a-stepbystep-guide)
- Secure the Joined Sections of Artificial Grass
- geegrass.com (https://geegrass.com/news/which-glue-for-instaling-articual-grass-41.html)
- 18 Artificial Grass Installation Mistakes (and How to Solve Them) (https://neograss.co.uk/18-artificial-grass-installation-mistakes-and-how-to-solve-them)
- How to Seam Artificial Grass | NexGen Lawns (https://nexgenlawns.com/how-to-seam-artificial-grass?srsltid=AfmBOoqYTgwYVzvegwZjXIenMSsvrs5AxIAMzg-U1j440GvZ0RmIIXgv)
- The Complete Guide To Artificial Turf Glue | Chemique US (https://chemiqueadhesives.com/us/the-complete-guide-to-turf-glue)
- artificialturfexpress.com (https://artificialturfexpress.com/blog/sticking-it-10-adhesive-tips-for-synthetic-turf-installation)
- Apply Infill and Brush the Joined Grass
- Artificial Turf Infill Options (Pros, Cons & Best Uses) | US Turf (https://usturfsandiego.com/news/artificial-turf-infill-options)
- 9 Types of Infill for Artificial Grass | Best Turf Infill Options - Mighty Grass (https://mightygrass.com/types-of-infill-for-artificial-grass)
- petgrows.com (https://petgrows.com/blogs/news/artificial-turf-infill-101-what-you-need-to-know-before-you-buy)
- Artificial Turf Infill Market: Trends & Growth Analysis 2035 (https://wiseguyreports.com/reports/artificial-turf-infill-market)
- Artificial Turf Infill Market Size 2026 | Strategy, Trends & Challenges 2033 (https://linkedin.com/pulse/artificial-turf-infill-market-size-2026-strategy-sgkdc)