Introduction
Transforming a backyard into a lush, green oasis is now more accessible than ever, largely due to the rising popularity of artificial grass. This synthetic solution not only enhances the aesthetic appeal of outdoor spaces but also offers low maintenance and durability, making it an attractive choice for homeowners. However, achieving a perfect lawn requires careful planning and execution. What are the essential steps to ensure a flawless installation?
Plan Your Installation Site
- Assess the Area: Start by measuring the dimensions of the intended installation space. Ensure it is free of obstacles such as trees, rocks, or other vegetation that could complicate the installation process. is designed for easy installation and low maintenance, making it a hassle-free choice for homeowners.
- Evaluate Sunlight Exposure: Observe the sunlight patterns throughout the day. , which is essential for preserving its color and structural integrity. Landscape architects emphasize that sufficient sunlight exposure is crucial for the optimal performance and longevity of the grass. Notably, 44% of potential buyers prioritize a natural look when considering , underscoring the importance of sunlight in achieving a realistic appearance. are expertly crafted to maintain their lush appearance year-round.
- Check Drainage: , which can damage the turf. If the area tends to retain water, consider grading the site to enhance drainage capabilities, ensuring a stable foundation for fitting artificial grass. and base preparation are essential for maintaining consistent ball roll and preventing pooling, as emphasized by industry experts. California Grass Company’s products are designed to endure various weather conditions, ensuring durability and performance.
- Consider Usage: Reflect on how the space will be utilized. For instance, a for optimal playability, while a pet-friendly lawn should prioritize durability and comfort to withstand wear and tear. Notably, 24.5% of clients are looking to create a , indicating a growing trend towards family-friendly outdoor environments. are ideal for families who desire a beautiful, safe outdoor area.
- Plan for Edging: Determine the type of edging that will define the synthetic grass area. Options include stones, wood, or other materials that harmonize with your landscape design, enhancing both aesthetics and functionality. As the artificial turf market is projected to reach USD 9.97 billion by 2030, of your installation. California Turf Company offers tailored solutions to ensure your installation looks great and lasts for years.

Prepare the Base for Artificial Grass
- Remove Existing Vegetation: Start by , weeds, and debris. This step typically requires tools such as a shovel or a sod cutter to effectively remove the top layer of soil, ensuring a .
- Excavate the Area: Dig down approximately 3 to 4 inches to create sufficient space for the . This depth is essential for and provides a stable foundation for the .
- Add : Fill the excavated area with well-draining materials like crushed stone or decomposed granite, spreading it evenly to a depth of about 2 to 3 inches. This layer is vital for drainage and is important for fitting to help prevent any future settling of the turf.
- Install a : Lay down a over the . This material is important for preventing weeds while allowing moisture to flow, thereby enhancing the durability of your installation.
- Compact the Base: Use a plate compactor to thoroughly compact the . This step is crucial for fitting , as it helps prevent settling and ensures a sturdy base that will support the over time.
- Level the Surface: After compacting, use a rake to level the surface, ensuring it is smooth and even. Pay attention to any low spots that may require additional material to achieve a flawless finish.

Install and Secure the Artificial Grass
- Roll out the fitting artificial grass by laying it over the prepared base. Ensure that all pieces are oriented in the same direction for a consistent appearance. Allow the grass to acclimate for approximately three hours to minimize curling and ensure a .
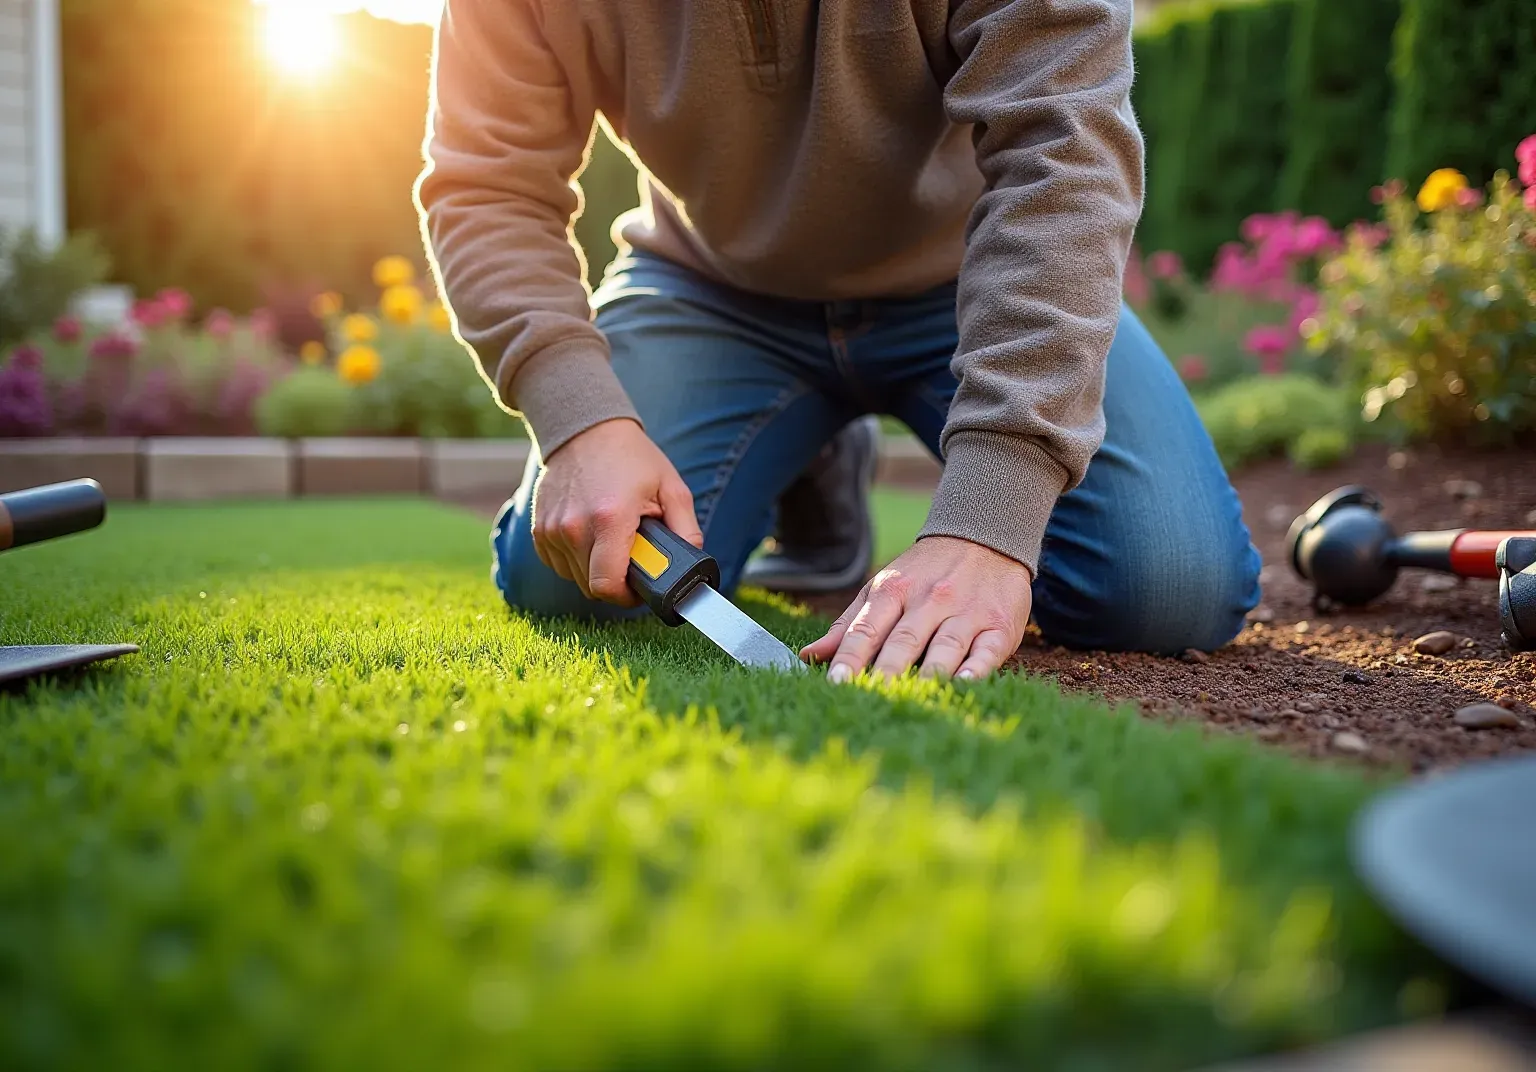
- Trim the edges of the area to , using a utility knife carefully. Leave a slight excess to tuck under any borders or hardscape edges, which helps create a clean finish.
- Secure the fitting artificial grass: To firmly anchor the fitting artificial grass, utilize , placing them every 3 to 6 inches around the perimeter. This method is essential for maintaining the grass's position and preventing shifting over time.
- When fitting artificial grass, if your project involves multiple sections of grass, employ to join them securely. Ensure that the seams are tight and aligned to achieve a seamless and natural appearance.
- Brush the Surface: After securing the surface, use a power broom or a stiff-bristled broom to brush the fibers upright. This final step improves the natural appearance and texture of the turf, ensuring a lush and inviting lawn.
To begin your , start your complimentary consultation with . During this consultation, our experts will assess your specific needs and the installation area, ensuring you receive tailored advice and support throughout the process.

Finalize Installation and Maintenance Tips
- : Start by examining the area to identify any loose edges or sections that may need additional securing. Make necessary adjustments to ensure a tight and professional finish.
- Infill the Turf: If your , such as sand or rubber granules, distribute it evenly across the surface according to the manufacturer's guidelines. Appropriate infill not only weighs down the surface but also provides essential cushioning, enhancing the overall performance and durability of the grass. Infill is crucial for maintaining the grass's structure, keeping fibers upright and preventing matting, which is vital for a lush appearance.
- : Periodically rinse the surface with water to remove dust and debris. For areas frequented by pets, spot clean as needed using a mild soap solution. is essential; aim to at least once a week, especially in high-traffic areas, to keep the fibers standing tall and strong.
- : Regular brushing of the grass helps preserve its appearance and prevents the fibers from tangling. This practice is particularly important in areas with , ensuring the turf remains visually appealing and functional.
- : Monitor the edges and seams for any signs of weed growth. If you notice any, apply a weed killer that is safe for artificial grass to prevent unwanted vegetation from compromising the aesthetic and safety of your lawn. Regular inspections can help catch issues early, maintaining the integrity of your installation.
Initiate Your Free Consultation with for and !

Conclusion
Successfully installing artificial grass requires careful planning and execution to achieve a beautiful, functional lawn. By following the outlined steps-from assessing the installation site to maintaining your synthetic turf-you can ensure a seamless and long-lasting result. Proper site evaluation, including sunlight exposure and drainage, is crucial, as these factors significantly impact the performance and appearance of your artificial grass.
Key considerations include:
- Preparing the base
- Securing the turf
- Implementing maintenance practices
Each of these steps plays a vital role in the installation process, contributing to a sturdy foundation and a visually appealing finish. Regular upkeep, such as brushing and monitoring for weeds, will help maintain the integrity and aesthetics of your lawn over time.
Embracing artificial grass not only offers a low-maintenance solution for homeowners but also contributes to a sustainable landscape. With the right preparation and care, your synthetic lawn can provide a stunning outdoor environment for years to come. Consulting with experts can further ensure that your installation meets your specific needs and preferences, paving the way for a perfect lawn transformation.
Frequently Asked Questions
What should I assess before installing artificial grass?
Start by measuring the dimensions of the intended installation space and ensure it is free of obstacles such as trees, rocks, or other vegetation that could complicate the installation process.
Why is sunlight exposure important for artificial turf?
Adequate sunlight is essential for preserving the color and structural integrity of artificial turf. Sufficient sunlight exposure is crucial for optimal performance and longevity, as many buyers prioritize a natural look in their artificial grass.
How can I ensure proper drainage for my artificial grass installation?
Proper drainage is vital to prevent water pooling that can damage the turf. If the area retains water, consider grading the site to enhance drainage capabilities, ensuring a stable foundation for the grass.
What factors should I consider regarding the usage of the space?
Consider how the space will be utilized; for instance, a putting green requires a flat surface, while a pet-friendly lawn should prioritize durability and comfort to withstand wear and tear.
What types of edging can I use for my artificial grass installation?
You can use various types of edging such as stones, wood, or other materials that harmonize with your landscape design, enhancing both aesthetics and functionality.
What is the projected market value for artificial turf by 2030?
The artificial turf market is projected to reach USD 9.97 billion by 2030, indicating a growing demand for quality installations and materials.
List of Sources
- Plan Your Installation Site
- Artificial Grass, Market Trends, Business Insights, and Analysis (https://installartificial.com/how/artificial-grass-business-insights-market-trends)
- Artificial Turf Market Size And Share | Industry Report, 2033 (https://grandviewresearch.com/industry-analysis/artificial-turf-market)
- Backyard Putting Green Design Trends Homeowners Will Love in 2026 (https://artificialturfexpress.com/blog/backyard-putting-green-design-trends)
- Artificial Grass News | American Syn-Turf Industry Updates (https://americansynturf.com/news)
- North Texas–Based Turf Product Solutions Becomes the Nation’s #1 Artificial Turf Broom Brand in Just 365 Days (https://columbiatribune.com/press-release/story/44017/north-texas-based-turf-product-solutions-becomes-the-nations-1-artificial-turf-broom-brand-in-just-365-days)
- Prepare the Base for Artificial Grass
- Nevada Law Requiring Removal of ‘Useless’ Grass Has Killed 100,000 Las Vegas Trees, Lawsuit Claims (https://planetizen.com/news/2026/01/136771-nevada-law-requiring-removal-useless-grass-has-killed-100000-las-vegas-trees)
- Once it was hailed as a drought fix — but now California's moving to restrict synthetic turf over health concerns (https://calmatters.org/environment/2023/10/california-synthetic-turf-pfas)
- Race to remove non-functional grass across Southern Nevada (https://fox5vegas.com/2025/01/29/race-remove-non-functional-grass-across-southern-nevada)
- How to Choose the Right Base for Artificial Grass (https://realturf.com/us/what-sub-base-is-best-for-your-artificial-grass)
- Colorado cities accelerate turf wars with new construction bans, public median rip-outs (https://coloradosun.com/2023/10/10/colorado-cities-turf-bans-grass-removal)
- Install and Secure the Artificial Grass
- How to Secure Artificial Turf Perimeter Edges: Galvanized Nails or Sod Staples (https://artificialturfsupply.com/how-to/how-to-secure-artificial-turf-perimeter-edges-galvanized-nails-or-sod-staples)
- How to Install Artificial Grass: DIY Tips For Your Lawn (https://flooringinc.com/blog/how-to-install-artificial-grass?srsltid=AfmBOorKvhMJ1EFaoLioey5asFJERBfmsUSiRgQILcAJWEwDfHgE_SX2)
- How to Install Artificial Grass (The Complete Guide) (https://aquablumosaics.com/blogs/news/how-to-install-artificial-grass?srsltid=AfmBOoohAjLtnsu9q1ZzMiKsydcYoWwnxmE3YTr_0bfAlfHTYgyLdnre)
- How To Install Artificial Grass | SGW (https://sgwflorida.com/orlando/resources/installing-artificial-grass/step-by-step-guide-to-installing-artificial-grass)
- How to Install Artificial Grass on Soil | US Turf (https://usturfsandiego.com/news/how-to-install-artificial-grass-on-soil)
- Finalize Installation and Maintenance Tips
- What is Artificial Grass Infill and Why Do You Need It? (https://themotzgroup.com/sport_blog/what-is-artificial-grass-infill-and-why-do-you-need-it)
- smartturf.com (https://smartturf.com/artificial-grass-101-guide)
- Solve Artificial Turf Installation Issues: Expert Fixes (https://artificialturfexpress.com/blog/troubleshooting-guide-for-diy-installation-of-the-best-artificial-turf)
- The Ultimate Checklist for a Flawless Artificial Turf Installation - The Turf Yard (https://theturfyard.com/the-ultimate-checklist-for-a-flawless-artificial-turf-installation)