Introduction
As artificial grass gains popularity, homeowners are increasingly attracted to its low maintenance and aesthetic appeal. The journey to achieving a lush, green lawn, however, begins with careful planning and execution. This guide outlines the essential steps for installing fake grass, empowering readers to transform their outdoor spaces with confidence. Potential challenges during installation may arise, but with the right strategies, one can navigate these obstacles for a flawless finish.
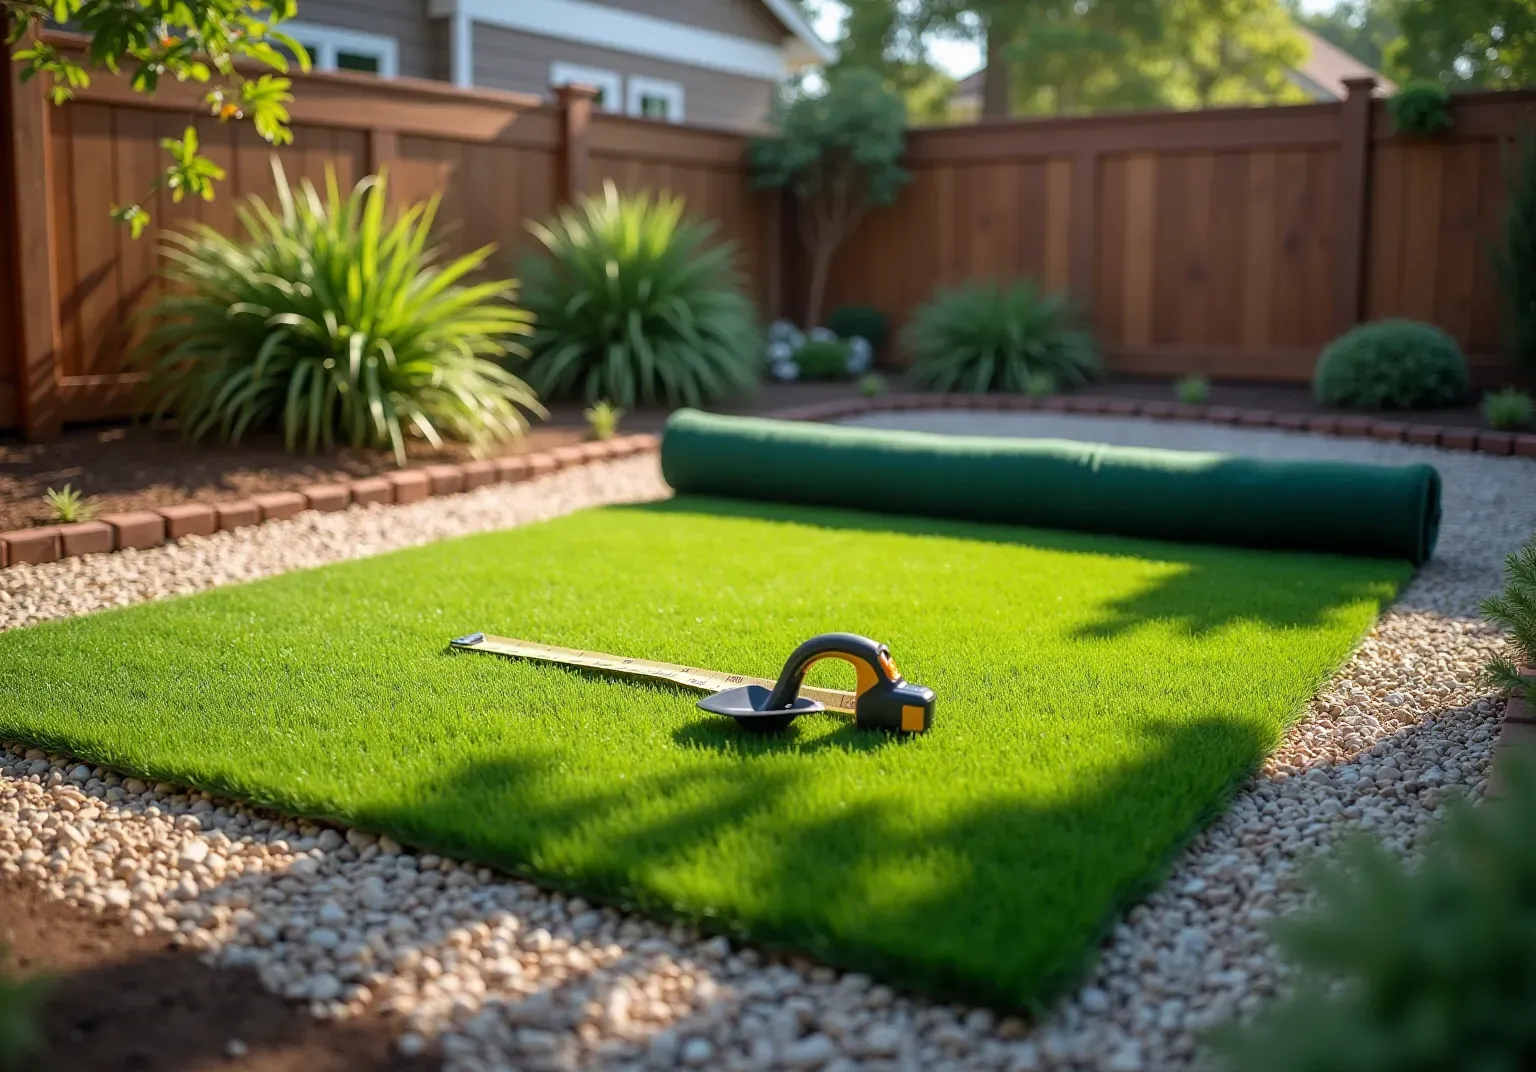
Plan Your Installation Area
- Measure the Area: Start by using a tape measure to accurately determine the dimensions of the space designated for placement. Be sure to account for any curves or irregular shapes to ensure a precise fit.
- : Inspect the area for any trees, flower beds, or structures that could hinder the setup. Mark these obstacles on your plan to facilitate a smoother installation process.
- : Proper drainage is crucial to prevent water pooling. Assess the area for adequate drainage and, if necessary, plan for slight grading to direct water away from structures and ensure optimal performance of the turf.
- : Select the appropriate type of artificial turf based on its intended use-whether for , , or pet areas. This choice will impact both functionality and aesthetics.
- Visualize the Layout: Create a rough sketch of the area layout, including any features such as paths or borders. This visualization will assist you in envisioning the final look and making any required modifications before setup.
Additional Considerations:
- : In 2026, the estimated cost to install in California ranges from $10 to $20 per square foot, depending on the quality and complexity of the installation.
- : According to OC Turf & , "Proper site preparation is crucial for guaranteeing the durability and performance of your synthetic turf setup."
- Permits: Be aware that depending on the size and scope of your project, you may need to check with local authorities regarding permits or inspections before moving forward with setup.
- : While can enhance curb appeal and reduce maintenance costs, it's important to note that it may by approximately 5% if you plan to sell your home in the future.

Gather Tools and Materials
-
Essential Tools: To ensure a successful installation, gather the following tools:
- Shovel: For removing the existing lawn and digging up the top 2-4 inches of soil.
- Wheelbarrow: To transport soil and debris out of the yard efficiently.
- Hand tamper: To pack the base material firmly, creating a solid foundation for the grass.
- Hammer or mallet: Essential for driving in grass nails or staples to secure the grass in position; a longer handle is suggested for improved leverage.
- : Preferred for cutting grass to fit the shape of your yard, ensuring clean edges.
- Tape measure: To accurately measure the area and ensure you have sufficient sod.
- Rake: For leveling the base material and preparing a smooth surface.
- Pickaxe: Useful for removing larger rocks and tree stumps during the lawn removal process.
- Landscape fabric (weed barrier): Optional, but can help prevent weeds from sprouting through the new lawn.
-
Materials Needed: Purchase the following materials to complete your installation:
- : Choose high-quality turf that suits your specific needs, such as pet-friendly or playground options.
- Crushed stone or decomposed granite: This material creates a stable base with proper drainage, essential for the longevity of your grass.
- : Use this if necessary to secure the grass in areas where nails cannot be utilized, such as on patios.
- : Recommended to secure the grass to the base, with 40-D 5 inch non-galvanized nails being ideal for this purpose.
- : Depending on your grass type, infill can enhance stability and provide a natural grass-like feel; ordering extra infill is advisable for future applications.
- Seam tape: Necessary for securing larger areas of turf together, ensuring that joins are not visible.
-
Safety Gear: Prioritize safety by wearing gloves, , and a dust mask during the setup process. This protective gear will help you avoid injuries and ensure a smoother project.
- Dump trailer: Recommended for disposing of the existing lawn and soil according to local regulations.

Prepare the Base for Turf Installation
- Clear the Area: Start by removing any existing vegetation, weeds, and debris from the installation site. Tools such as a shovel or a sod cutter may be necessary to ensure a .
- Excavate the Soil: Dig down approximately 3-4 inches to create a suitable base for the . It's crucial to ensure the area is or roots, as improper excavation can lead to uneven surfaces and drainage issues.
- : Lay down a landscape fabric to prevent weeds from growing through the grass. This step is vital for ; neglecting it can lead to unsightly disruptions and compromise the integrity of the installation. Specialists have noted that ignoring can significantly impact the durability and appearance of your lawn.
- Add Base Material: Fill the excavated area with . Spread the material evenly and compact it using a hand tamper or plate compactor to create a solid foundation. A well-prepared foundation is essential for ensuring both beauty and durability in , particularly with the . It is recommended to double compact the base layer for a dense and strong foundation, preventing future issues.
- Check for Levelness: Use a level to verify that the surface is even. Make necessary adjustments to avoid any high or low spots, as these can lead to water pooling and other complications later on. , as it directly affects the performance and longevity of the turf.

Lay and Secure the Artificial Grass
- Unroll the Turf: Begin by carefully unrolling the over the prepared base. Allow it to acclimate to the temperature for a few hours. This step helps reduce curling and ensures a smoother installation.
- : Use a utility knife to trim the edges of the grass to fit your designated area. Always cut from the back to avoid damaging the plant fibers. This technique ensures a clean edge that blends seamlessly into your landscape.
- : To of the grass, utilize , spacing them approximately every 6 inches along the perimeter. Research indicates that is typically more effective for securing grass edges and smoothing out wrinkles. However, staples can be advantageous for intricate shapes and corners. Aim for approximately 1 nail or staple per square foot of grass to maintain stability.
- Seam the Grass: If your project involves multiple pieces of grass, employ to join them together. Ensure that the seams are tight and nearly invisible, enhancing the overall appearance of your installation.
- : After securing the turf, use a broom or brush to lift the plant fibers, giving it a . Regular brushing helps keep the fibers upright and prevents matting, ensuring your remains vibrant and inviting.

Finish and Maintain Your Artificial Grass
-
: Infill is essential for as it provides stability, cushioning, and helps keep the blades upright. Distribute the infill uniformly over the surface with a drop spreader to ensure optimal performance and durability of your grass. According to SGW, "Turf infill is crucial for supporting plant blades, providing cushioning, and protecting the backing."
-
Final Touches: Trim any visible seams and tuck the edges neatly to create a seamless appearance. Adding decorative borders or edging can enhance the overall aesthetic and provide a polished finish.
-
: To maintain the of your grass, establish a routine that includes:
- Rinsing with water to eliminate dust
- Brushing the fibers to keep them upright
Statistics recommend a , thorough brushing monthly, and deep cleaning 2-4 times per year. This routine can significantly of compared to natural lawns.
-
: Quick action is crucial when dealing with spills or stains. Clean them promptly using a gentle soap solution and water, avoiding harsh chemicals that could damage the surface. This proactive approach helps maintain the turf's appearance and prevents long-term damage.
-
: Conduct regular inspections for signs of wear or damage. Addressing any issues promptly, such as replenishing infill or repairing seams, is vital for extending the life of your and ensuring it remains functional and attractive.

Conclusion
Planning and executing a successful artificial grass installation is essential for creating a beautiful and functional outdoor space. By carefully measuring the area, identifying obstacles, securing the turf, and establishing a maintenance routine, anyone can enhance their property effectively.
Key insights include:
- Proper Site Preparation: Ensuring the area is clear and ready for installation is crucial for durability.
- Selecting the Right Materials: Choosing high-quality turf and infill contributes to the overall aesthetic appeal.
- Understanding Maintenance Needs: Familiarity with the upkeep required for synthetic turf ensures longevity.
Each step, from clearing the area to laying the grass and adding infill, plays a vital role in the installation's success. Additionally, being aware of potential impacts on property value and local regulations can guide decisions that align with long-term goals.
Ultimately, investing time in these steps will yield a vibrant, low-maintenance lawn that can be enjoyed for years. Embracing these best practices not only enhances the immediate environment but also ensures that the artificial grass remains a valuable asset, providing beauty and functionality while requiring minimal upkeep.
Frequently Asked Questions
What is the first step in planning for artificial grass installation?
The first step is to measure the area using a tape measure to determine the dimensions of the designated space for artificial grass placement, accounting for any curves or irregular shapes.
Why is it important to identify obstacles in the installation area?
Identifying obstacles such as trees, flower beds, or structures helps to facilitate a smoother installation process by marking these features on your plan.
How can drainage affect the installation of artificial grass?
Proper drainage is crucial to prevent water pooling. It's important to assess the area for adequate drainage and plan for slight grading if necessary to direct water away from structures.
How do I choose the right type of artificial turf?
The right type of turf should be selected based on its intended use, such as for putting greens, playgrounds, or pet areas, as this choice affects both functionality and aesthetics.
What should I do to visualize the layout before installation?
Create a rough sketch of the area layout, including features like paths or borders, to help envision the final look and make any necessary modifications before setup.
What are the average costs for installing artificial grass in California in 2026?
The estimated cost ranges from $10 to $20 per square foot, depending on the quality and complexity of the installation.
Do I need any permits for my artificial grass installation project?
Yes, you may need to check with local authorities regarding permits or inspections, depending on the size and scope of your project.
How does installing artificial grass impact property value?
While artificial grass can enhance curb appeal and reduce maintenance costs, it may lower property value by approximately 5% if you plan to sell your home in the future.
What essential tools are needed for the installation of artificial grass?
Essential tools include a shovel, wheelbarrow, hand tamper, hammer or mallet, razor blade or box cutter, tape measure, rake, pickaxe, and optional landscape fabric.
What materials are required for completing the installation?
Required materials include artificial grass rolls, crushed stone or decomposed granite, landscape adhesive, turf nails or staples, infill material, and seam tape.
What safety gear should I wear during the installation process?
It is recommended to wear gloves, safety glasses, and a dust mask to avoid injuries and ensure a smoother project.
What is a dump trailer used for in the installation process?
A dump trailer is recommended for disposing of the existing lawn and soil according to local regulations.
List of Sources
- Plan Your Installation Area
- Homewyse Calculator: Cost to Install Artificial Lawn (https://homewyse.com/services/cost_to_install_artificial_lawn.html)
- How Much Does Artificial Grass Cost in 2026? (https://lawnstarter.com/blog/cost/artificial-grass-price)
- 2026’s Biggest Artificial Turf Putting Green Design Trends - OC Turf & Putting Greens (https://octurfandputtinggreens.com/2026s-biggest-artificial-turf-putting-green-design-trends)
- 2026 Artificial Grass Installation Cost | Angi (https://angi.com/articles/how-much-does-artificial-turf-cost.htm)
- Artificial Turf Cost in 2026 | How Much Does Fake Grass Cost? (https://aglgrass.com/blogs/artificial-turf-cost)
- Gather Tools and Materials
- DIY Guide: Essential Tools for Installing (https://blog.artificialgrassrecyclers.com/diy-guide-tools-you-need-to-install-your-own-artificial-turf)
- Artificial Grass Install Accessories That Should Be in Every Installer’s Toolkit - SGW Phoenix (https://sgwarizona.com/phoenix/blog/artificial-grass-install-accessories-that-should-be-in-every-installers-toolkit)
- 10 Best Artificial Turf Installation Tools for Your Project - AGL (https://artificialgrassliquidators.com/artificial-turf-installation-tools)
- 5 Key Supplies You Need for Your Next Artificial Turf Installation - SGW Dallas (https://sgwtexas.com/dallas/blog/2023/02/28/5-key-supplies-you-need-for-your-next-artificial-turf-installation)
- Prepare the Base for Turf Installation
- shawgrass.com (https://shawgrass.com/about/news-blog/how-to-prep-for-artificial-grass-installation)
- The Overlooked Importance of Base Preparation in Artificial Turf Installation (https://portotheme.com/the-overlooked-importance-of-base-preparation-in-artificial-turf-installation)
- A Step-by-Step Guide to Installing Artificial Turf Grass (https://lowes.com/n/how-to/install-artificial-grass)
- How to Prep the Base for Artificial Grass (https://installartificial.com/how/to-prep-the-base-for-artificial-grass)
- How to Install Artificial Turf on Dirt | US Turf (https://usturfsandiego.com/news/how-to-install-artificial-turf-on-dirt)
- Lay and Secure the Artificial Grass
- ccgrass.com (https://ccgrass.com/how-to-secure-artificial-grass-properly)
- Ultimate Guide to Securing Artificial Turf (https://premiumgrassblades.com/the-ultimate-guide-to-securing-artificial-turf-spiral-nails-staples-and-proper-installation)
- How Do You Secure The Edges of Artificial Grass? (https://mylovelylawn.com/how-do-you-secure-the-edges-of-artificial-grass)
- A Step-by-Step Guide to Installing Artificial Turf Grass (https://lowes.com/n/how-to/install-artificial-grass)
- gardenista.com (https://gardenista.com/posts/case-study-7-gardens-with-artificial-grass)
- Finish and Maintain Your Artificial Grass
- Artificial Turf Maintenance Guide | Cleaning & Care Tips (https://fieldturflandscape.com/maintenance/artificial-turf-maintenance-guide)
- How To Maintain Artificial Grass: 9 Practical Tips (https://dfwturf.com/how-to-maintain-artificial-grass)
- How To Maintain & Care For Your Synthetic Grass | SGW (https://syntheticgrasswarehouse.com/resources/maintenance-care)
- 6 Tips for Maintaining Artificial Turf | Magnolia Turf (https://magnoliaturf.com/tips-for-artificial-grass-maintenance)
- How to Maintain Your Artificial Grass All Year Round (https://synlawn.com/articles/how-to-maintain-artificial-grass)